How sump pumps work and why they matter
Updated April 28, 2017 . AmFam Team
When you think of your favorite piece of equipment in your house, your sump pump might not be at the top of the list. But maybe it should be because it helps keep your basement dry, comfortable and flood-free.
Understanding how this hard-working piece of equipment functions is a crucial first step to taking better care of it so you can proactively avoid potential water issues on your lower level. Let’s dive in and take a look at how sump pumps work.

The basics of how sump pumps work
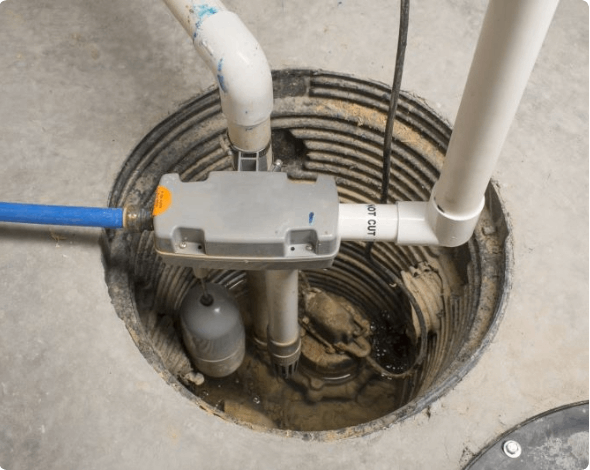
Sump pumps are typically located in the lowest portion of a home or building and are designed to prevent flooding after storms and heavy rainfall.
Pits beneath the structure collect water. If the water level reaches a certain point, the sump pump automatically turns on and pumps the water out of the pit and away from the home’s foundation. How often your sump pump runs depends on the amount of moisture you have.
While the pit and pump are typically easy to locate, there are other parts of your sump pump that are working to keep moisture out of your home, too. The sump pump discharge pipe takes water from the pit and deposits it outside. It must be carefully placed to ensure that the water does not rush back to the foundation. These pipes also need a check valve to keep the water flowing out, not back in.
Inside the sump pump is a motor with a fan-like device that pushes water out through the pipe. While most of these motors are powered by electricity, there are also hand-pump versions. And you can even get a sump pump battery backup. These options come in handy if there’s a power outage in the middle of a big storm, protecting you from flooding when you need it most.
Your sump pump works quite a bit like your toilet tank and is automatically activated through a float sensor. If there is a float sensor issue, you can typically activate the sump pump manually. You’ll save yourself from potential headaches by checking the float sensor and keeping on top of other sump pump maintenance.

Sump pump maintenance tips
To keep your sump pump in great condition, an annual check-up is recommended. The best time to do this is after winter when you’re prepping your home for spring storms. If you can, check your sump pump before the snow and ground thaw so you’re confident it’s ready to handle whatever Mother Nature brings.
Open it up. Take the cover off of the sump pump pit or basin and have a look inside. Clear any debris, mud or rocks that you find — this helps prevent clogs. If the top of the water looks greasy or like there’s an oil slick, you might have issues with your pump’s motor.
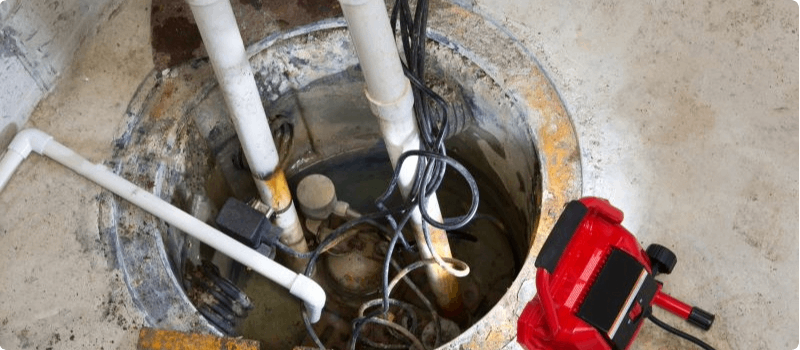
Take a closer look. Unplug your pump before you handle it or stick your hand in the hole. Pull out the pump and check the inlet screen and the fan-like impeller for debris. If there is any, clear it away. Make sure the drain hose is connected and that it’s not blocked or frozen.
Keep it afloat. Is the float resting on top of the water, and is it able to move freely? If it’s blocked or no longer floating, it’s not going to work correctly.
Time to test. If your pump is still unplugged, plug it back in before you try testing it. Fill the pit with a bucket of water, or just enough so the float reaches the sensor switch. Once the switch is flipped, your sump pump should start working. Go outside to make sure the water is being pumped outside and that it’s directed away from your home. If it’s running inside but nothing is coming out, your discharge pipe needs attention.
Flush the discharge pipe. The testing portion above should flush your discharge pipe in normal situations. But sometimes, larger rocks or twigs can get caught in the pipe and cause a blockage. To dislodge this, unplug the power again and disconnect the pipe from the pump. Run high-pressure water through it or use a plumbing snake to clear out the debris.
Does my home need a sump pump?
Not all homes come with a sump pump, and that’s perfectly fine. But there are some homes that don’t have sump pumps that do need one. So, how do you determine if you need a sump pump? Check for the following:
History of floods. If your home has a history of flooding, then a sump pump might be a good idea. But your first line of defense is to look at the exterior and determine where the water is coming from. Sometimes, water gets in through clogged drainage systems or the landscaping forces water back toward the home. If these fixes work, then you don’t need a sump pump.
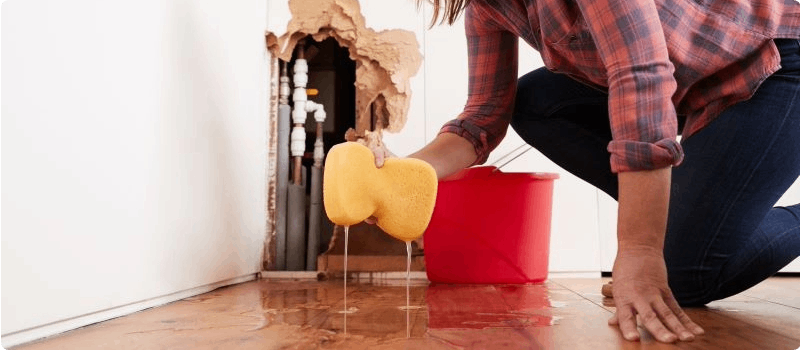
You have a wet basement. Floods aren’t necessarily the only reason why you might have a wet basement. Damp air and moisture on the walls and floor can signal an issue with groundwater.

You live in a flat or low-lying area. These areas tend to naturally collect water and if the soil doesn’t drain well, you’re at risk for flooding.
Lots of rain and snow. If you happen to live in an area that experiences a seasonal influx of rain or snow, then there’s a good chance you’ll face water concerns at some point.
Basement living space. If your basement is finished and serves as living space for your family, you could probably benefit from having a sump pump. It can protect your walls, carpet, furniture and other items from water damage and mold. If you don’t have a finished basement but use it for storage, you might want to consider a sump pump.
If you already have a sump pump, check with your American Family Insurance agent (Opens in a new tab) about adding sewer back-up and sump pump overflow coverage. This will help if you run into problems one day and discover an unexpected (and wet) surprise in your basement.