Homeowners inspection checklist
Updated April 1, 2024 . AmFam Team
Your house hunt is over — you’ve finally found the one you see a future in! Before you pack the moving truck, make sure your soon-to-be home is in great shape.
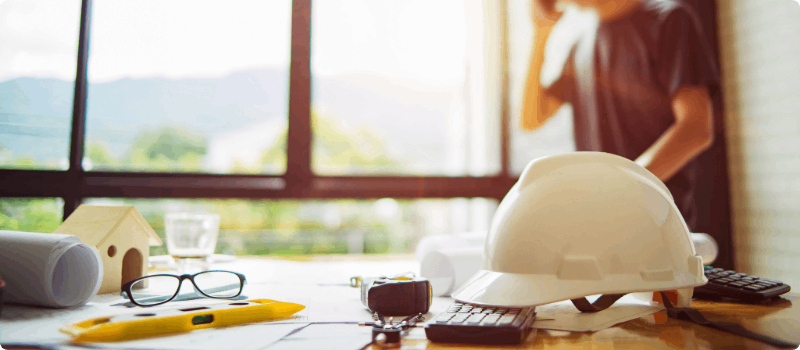
To help make sure your new home is in great shape, hire a professional home inspector. A good, trustworthy home inspector will help you identify any safety concerns and structural issues with your new home and will also take into consideration your own checklist of concerns.
Why do I need a home inspection and is it required?
Although paying for the home inspector is typically your responsibility as the buyer, a home inspection is one of the most useful tools you have at your disposal. This is because the inspector will let you know if there are problems and can point out good aspects of the home, too. You can use the inspection report to decide if the home is really the right buy for you and can help you get a fair price.
It’s also important to note that your mortgage lender will typically require your home be inspected, as it’s often part of the appraisal to ensure what they’re lending you is a fair representation of the actual market value of the home. And to confirm the property’s condition is as described as well.
A home inspection gives buyers a better understanding of the property's condition. It uncovers potential hazards, like faulty wiring in the electrical panel, that could cause problems for your family down the road. Any problems that happen after the sale are generally your responsibility as the buyer if you skip the inspection.
Home inspections are usually optional but may be required in certain circumstances. If there is an inspection contingency in the purchase agreement, the buyer may need a home inspection. Inspection contingencies, or due diligence contingencies, give the buyer a set amount of time to inspect the house. After the inspection, potential buyers can negotiate repairs or cancel the mortgage contract.
An inspection of a home is different from an appraisal, which is almost always required. Appraisals for FHA and VA loans differ from those for conventional loans. Contact your insurance agent for more information about FHA and VA loans.

How to get a home inspection
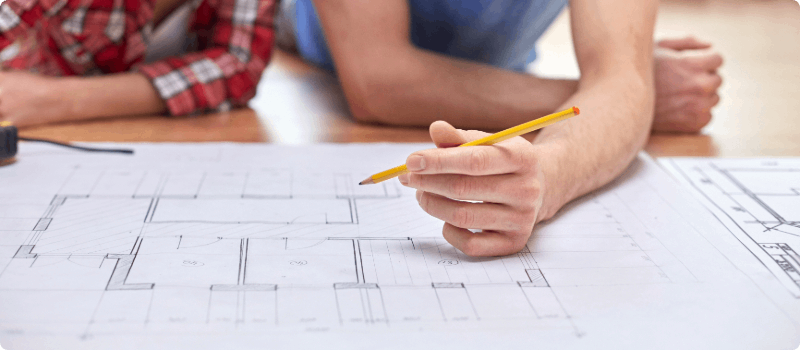
Choosing a home inspector you're comfortable with is very important. An experienced inspector will be able to help you avoid major pitfalls during the process of buying a home.
Schedule your home inspection early
To give yourself time to negotiate, schedule your home inspection as soon as possible after your offer is accepted. Because the purchase price isn't final until closing, you can ask the seller for a new price if a problem is found during the inspection.
Your real estate agent can help
Some realtors may have inspectors they trust or have worked with in the past. Ask your real estate agent if they have any recommendations.
Do your own research
Choose an inspector who's a member of the National Institute of Building Inspectors, the American Society of Home Inspectors and the International Society of Certified Home Inspectors. There's a "find an inspector" service on their websites so that you can find a member near you.
Check with your friends and family
There may be someone you know who has recently gone through the process of buying a home, and they might be able to make a good recommendation for you.

Should buyers attend an inspection?
While not required, it may be a good idea to ask to tag along on your home inspection. You can ask questions, observe, and learn more about your new property and how to maintain it by following your home inspector. Make sure to ask questions. Home inspectors are there to look at the property and answer any questions you have about it.
Exterior home inspection checklist
Once you have a home inspector, make sure they’re checking out these key things on the exterior of your home:
- All windows, doors and frames
- Exterior structures: Fences, sheds, decks, driveways, sidewalks, patios, retaining walls
- Drainage system
- Landscape, including yard, trees and walkways
- Structure of the home, including the foundation
- Roof
- Siding and other exterior surfaces
- Evidence of past water damage/standing water
Interior home inspection checklist
Your home inspector will also take a look at the interior of your home, so be sure they have a look at the following:
- Attic and upper crawlspaces
- All doors, windows and frames
- Floors, walls, ceilings and insulation of all rooms
- Light switches, electrical outlets and general health of electrical system
- Heating/cooling system
- Sump-pump and sewage system
- All major appliances and appliance outlets
- Plumbing system
- Any cabinets or fixed features of the home
- Fireplace
- Evidence of past water damage
- Stairways and handrails
- Smoke and carbon monoxide detectors
A professional home inspector will know exactly what to do but keep this list in your back pocket and double check that they’re giving your future home the attention it deserves.
How to prepare for a home inspection
If you’re wondering how to prepare for a home inspection, it’s thankfully straightforward. Preparing for a home inspection typically means having on hand the right information the inspector may need to accurately survey your home. Have the following at the ready when it’s time for your home inspection:
- The square footage of your home
- A list of, and cost estimates, for recent renovations or interior design work
- Smart water leak detectors or other home security systems you may have
If you’ve already moved into your new home, you’ll also want to tidy up and clear the way so that the inspector can more easily do their job. Be sure to do the following:
- Clean the inside of your home
- Clear the perimeter of your home
- Replace burnt bulbs
- Clearly label your fuse box
What do home inspectors look for?
When you hire a home inspector, you’re looking for a professional opinion on the overall condition of a home. Usually inspectors come into play when you’ve found a home that you want but you’re still in the negotiating phase of the deal. Here are the main things your home inspector will be looking for:
Structural integrity
From the inside to the outside, your inspector is going to carefully check out the home’s structure. You can expect them to climb on the roof, burrow into crawlspaces and inspect every corner closely. They could find something as significant as a missing load-bearing wall that needs immediate and expensive attention. Or there could be smaller concerns, like a mismatched section of baseboard. This is what’s great about having a home inspector. They’ll review everything and then explain to you whether the issues are significant or just something to note.
The roof
A home’s roof plays a vital role in protecting the structure and everything in it. Replacing a roof is expensive, and if the house needs a new roof, this can easily affect its value and price. During a home inspection, the roof will be reviewed from inside and out, top and bottom. Your inspector will be looking for loose shingles or tiles, watertight seals around chimneys, debris in gutters and if the gutters are firmly attached, and they’ll check if tree limbs are touching or hanging over the roof.
After inspecting the roof, they’ll typically be able to give you a rough estimate on its remaining lifespan. Remember, an inspector’s estimate doesn’t include damage that might occur from storms or other unexpected events.
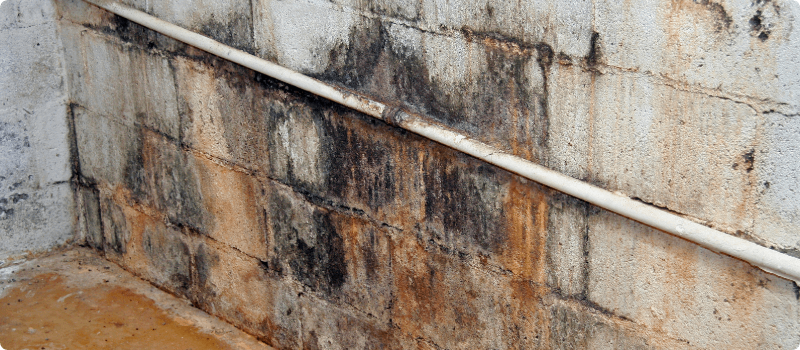
Water damage and leaks
From the roof to the basement and from every corner of the yard, your home inspector will evaluate how water plays a role on the property. Leaks inside the home can be a sign of major problems — past, present and future. Your inspector will look at how water reacts outside of the house, too. If the home doesn’t have the right drainage, water could flow toward it and cause problems later. Caught early enough, these water concerns can usually be fixed before the damage gets too great or before there’s any damage at all. A savvy buyer can use this information to potentially negotiate the cost of repairs.
Plumbing and electrical
The inspector will give these two main components a thorough evaluation to make sure everything is safe and functioning correctly.
Insulation and ventilation
A properly insulated and ventilated home is more energy efficient, promotes healthy movement of air and prevents moisture build-up. From attic to basement, these areas will be examined to ensure your future home has the best insulation and ventilation.
Appliances and interior features
Are you planning on keeping the appliances? Your inspector will check each one to make sure they’re in working condition. You’ll also get condition reports on doors, floors, stairways and hand railings, counters, cabinets and more.
Codes and regulations
Most home inspectors are experts in their local community’s codes and regulations. And their knowledge on these complex topics is extremely valuable since there are different codes for different buildings, depending on when they were built and the regulations in effect at that time.

What if the home inspector finds a problem?
Inspection reports rarely come back, showing that the home is flawless. After all, it’s been lived in and bound to show a little wear and tear. It’s up to you to decide if the report findings are important to you or insignificant. So how do you proceed? Use these steps to guide you on negotiating after a home inspection.
How much does it matter?
Ask yourself how much each repair matters to you. Is it a minor problem like a loose baseboard? If so, you might prefer to fix it on your own to avoid losing the sale. Or, you could encounter a more critical issue, like a leaky roof. Since roof repairs can be costly, this is an issue you might want to fix before you purchase the house.
Possible solutions for home inspection problems
During the inspection, create a list of the important issues and determine your preferred solutions.
Talk to your realtor
Your realtor will know the current market and might have some information on the sellers’ situation. Remember, if the contract goes back into negotiation, the seller can walk away from your offer. If the market is slow and the seller is motivated, you have a little more leeway when asking for repairs. On the other hand, if the house has several other offers and the seller isn’t in a hurry to sell, it might be difficult to ask for expensive repairs.
Ask for repairs paid and completed by seller
This means the seller will pay the full amount to have the repairs completed before you buy. There may be contingencies in place where the seller mandates repairs be made by a certain date. If the repairs are not made in time, you may be able to get your earnest money back if such contingencies are made. Learn more about home closing tips for buyers and contingencies.
Split the repairs
Often, the repair list is divided during negotiations. The seller might be willing to take on some of the expenses, but they’d like you to take on some of them, too. Don’t be surprised if you go back and forth with this list a few times before you find something everyone can agree to.
Ask for credit for repairs
If you’re willing to do the repairs or hire a professional, you can ask for credit. In this situation you get a little flexibility with time and money. You could ask the seller for the full amount of the repair or you could agree to split the costs. You also get to determine when to have the repair made so it’s most convenient for you. The credit can be figured out in a couple of ways; you can reduce the purchase price or ask for cash back credit at escrow.
Accept the house as is
You might decide the repairs aren’t that important to you and not significant enough to drop the value of the home. Or maybe you have your heart set on that house, and nothing else will do. You might feel that you’re in a seller’s market and lucky to have the deal you have. It’s important to note that you don’t have to take action on anything in the inspection report.
Walk away
This might sound like a dramatic decision, but if the inspection uncovered major concerns, this might be your best option. As long as your accepted offer has a home inspection contingency, this is an option for you. But you should talk to your realtor and possibly a real estate attorney first.

Can you get home insurance without an inspection?
It depends. Although it’s not recommended, one way you can get home insurance without an inspection is to ask your insurance provider if they require them. Some home insurance providers strongly suggest you get a home inspection before issuing you a policy, but not all do. If you don't have a mortgage and own your home outright, your insurance company may still require a home inspection. Reach out to your insurance agent to learn more.
What to do after a home inspection
When all the negotiations are done and a final agreement is reached, you’re going to need homeowners insurance to satisfy your lender’s requirements. Talk to your American Family Insurance agent well before you get to this stage so they can get your paperwork ready. Then, when the time comes, just check back in with your agent and your new home will be protected before you even enter the front door.
This article is for informational purposes only and based on information that is widely available. This is not part of your policy, and is not a promise or guarantee of insurance coverage. This information does not, and is not intended to, constitute legal or financial advice. You should contact a professional for advice specific to your situation.